AI-Assisted Coding on iPhone: A Journey of Tools, Freedom, and Joy
Introduction
For years, I thought of coding as something tied to my desk — Mac in front of me, full keyboard, full IDE. But recently, I found myself dreaming: what if I could carry my entire creative coding studio in my pocket? Not just SSH access, but a true AI-assisted environment where I could code, commit, and preview my projects anywhere.
This blog is half technical walkthrough, half personal reflection. It’s the story of how I explored Cloudflare Tunnel, discovered Tailscale, refined my workflow with tmux and iTerm, and ultimately unlocked the freedom of having a fully fledged Mac in my pocket.
The Spark
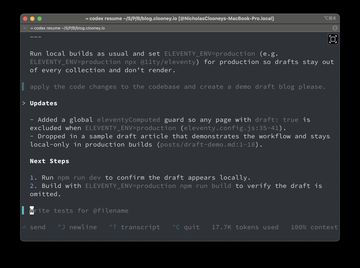
Before I even explored remote access, I was already using a three‑pane workflow in iTerm: the main pane, on the left, for chatting with Codex in natural languages, the top‑right for shorthand Git commands, and the bottom‑right for watching Eleventy serve logs. It is perfect for the programming on the go, on a tiny screen like iPhone!
It looked like this:
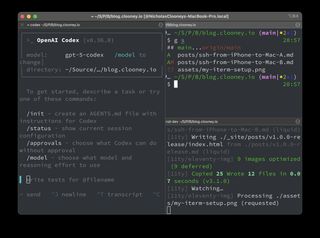
That setup became the foundation. The idea then started simple: I wanted to access my Mac remotely from my iPhone, from anywhere, use Codex to help me write and iterate on code, manage my repos with Git, and preview my Eleventy blog builds in Safari.
Why did this appeal to me? Three reasons:
- Safety net — I could fix or push code no matter where I was.
- Playground — I could experiment freely without being tied to my desk.
- Philosophy — proof that creativity doesn’t require heavy hardware, just the right connections.
That feeling of possibility is what pushed me forward.
Cloudflare Tunnel — The Struggle
I started with Cloudflare Tunnel because it seemed like the right balance of security and convenience:
- Run
cloudflaredlocally. - Wire a subdomain like
ssh.example.comto the tunnel. - Connect from anywhere with SSH or Mosh.
On paper, it was perfect. It’s a powerful system. Outbound-only connections mean no exposed ports, and Zero Trust policies could lock SSH behind MFA.
But in practice, it was tricky to set up. DNS didn’t resolve at first, configs needed polishing, and I never quite got to that satisfying ssh [email protected] moment. I knew Cloudflare was secure and enterprise-ready, but it felt like too much for my personal use case.
“This wasn’t a dead end, just a reminder: sometimes the simplest tool is the best fit.”
Tailscale — The Breakthrough
That’s when I stumbled upon Tailscale from a reddit chat about trouble setting up ssh with Cloudflare tunnel. A WireGuard-based mesh VPN, it promised simplicity without sacrificing power.
It is incredibly easy to set up.
On the Mac, you only need a few commands:
brew install tailscale
sudo tailscaled
tailscale up
On the iPhone, just get their app and login.
Once the Mac and iPhone joined the same tailnet, Instantly, both devices had private 100.x.x.x IPs.
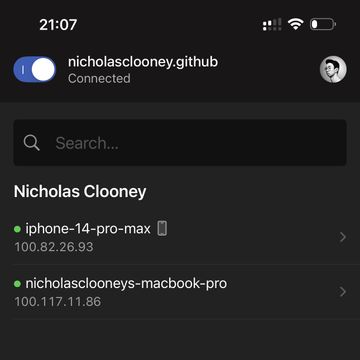
The first successful ping from iPhone to Mac landed like a magic trick.
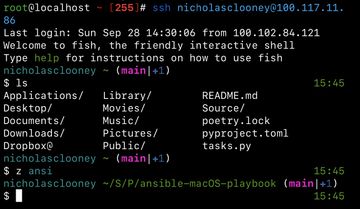
Being able to whisper ssh/mosh nicholas@<tailscale-ip> and drop straight into my workspace felt like achieving remote presence with almost no friction.
When tailscale serve started proxying the Eleventy preview, I thought that was the apex of the setup.
The real unlock was tailscale serve --https=443 http://localhost:8080. With npm run dev running on the Mac, Serve exposes the Eleventy preview behind Tailscale’s HTTPS without touching DNS or my router. It handed me a tidy HTTPS URL, it let me see the live blog build from the couch, the train, anywhere with signal. Every layer that clicked into place kept doubling the delight.
Then I noticed an even simpler trick: with Tailscale’s MagicDNS, the dev server is already reachable inside the tailnet at https://my-mac.my-tailnet.ts.net:8080 since it is exposed to 0.0.0.0 (so all interfaces). No Serve, no extra proxy — just the private mesh doing its thing.
Serve (or Funnel) can still publish to my tailnet if I ever need it for things like Umami which is only exposed to localhost, i.e. 127.0.0.1.
There’s no guessing which port is open, no extra certificates to manage — just a clean way to verify Codex’s work from anywhere.
“It wasn’t just working code — it was freedom. My Mac was suddenly everywhere I was.”
This was the leap. The point where I felt something unlock. I was free.
iSH and Blink — Choosing the Right Client
I experimented with two clients for SSH/Mosh on iOS.
- iSH: Alpine Linux emulation. Fun, but slower due to x86 emulation. Works fine for basic SSH, but laggy for Mosh.
- Blink: Smooth SSH and Mosh experience, polished interface. Downside: subscription model.
In the end, Blink gave me the best day-to-day experience, even if iSH was an interesting side quest.
tmux + iTerm — The Studio
With connectivity solved, I needed persistence and comfort. Enter tmux and iTerm.
tmux:
- Persistent sessions I could attach from both Mac and iPhone.
- Windows (tabs) and panes (splits) to organize my workflow.
- Custom config for auto-renaming, cwd inheritance, and mouse support.
- Default layout: main coding pane (Codex), top-right Git commands, bottom-right Eleventy logs.
iTerm2:
- Integrated with
tmux -CC, giving native tabs/splits on Mac. - Polished UI locally, while still syncing seamlessly with iPhone.
The result: a true “control room” for my projects. On Mac, iTerm felt natural. On iPhone, tmux gave me the same persistent workspace. When I reconnect from the iPhone, tmux drops me back into the exactly where I left off. It’s like pausing and resuming a gaming session without "ever getting up from the couch".
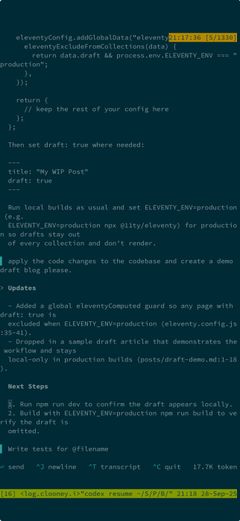
“This was my dream studio: Codex guiding me, Git at my fingertips, logs streaming live — all from the screen in my pocket.”
Same tmux "screen" (Codex). Just different sizes.
The Final Setup
Here’s what I ended up with:
- Tailscale for private, secure connectivity.
- Blink (or iSH) for SSH/Mosh on iPhone.
- tmux for persistence, shared sessions, and layouts.
- iTerm2 for native integration on Mac.
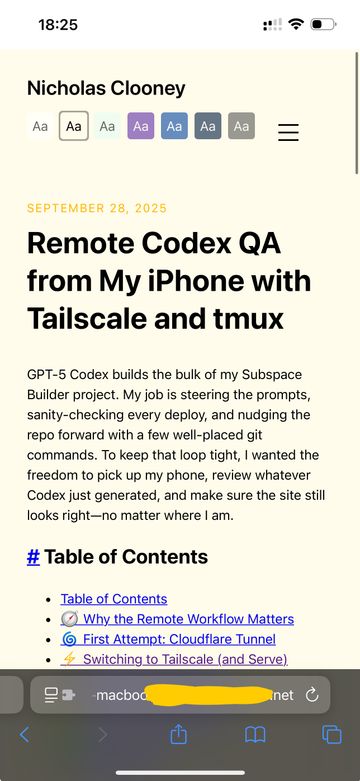
- Safari/Firefox on iPhone to preview Eleventy builds proxied through Tailscale.
It felt like magic: a fully fledged Mac in my pocket, always ready for creative bursts.
Reflections
This journey wasn’t just about tools. It was about unlocking freedom. The ability to:
- Experiment boldly, anywhere.
- Solve problems the moment inspiration strikes.
- Feel the joy of dreaming something in the morning and having it working by evening.
AI was the amplifier. Codex turned natural language into working code, while Tailscale and tmux made sure my environment was always within reach.
“Creativity doesn’t need a desk. It just needs the right connections — and maybe a little AI magic.”
Conclusion
From Cloudflare’s complexity to Tailscale’s simplicity, from tmux’s persistence to iTerm’s polish, this journey taught me something bigger than commands and configs: technology can give us freedom. Freedom to code, to create, to explore — anywhere, anytime.
I don’t just have a Mac at home anymore. I have a Mac in my pocket.